Wait what?! Suricata?! What happened to some more Snort?! Yes, yes, I know, last post I mentioned I would dive deeper into Snort and I will, I promise. Right now I wanted to get into some IPS functionality and figured I would start with something other than what I had already posted on. Now that we addressed that, lets move on!
Suricata is an open-source IDS/IPS solution developed by the Open Information Security Foundation (OISF) in 2009/2010. It analyzes network packets in real-time to detect suspicious behavior, such as attempted intrusions, malware infections, or denial-of-service attacks. Suricata uses a combination of signature-based detection, protocol analysis, and anomaly detection techniques to identify potential threats. It provides alerts and can also take action to block or mitigate malicious activity, helping to enhance the security of networks and systems.
And, its also named after everyone’s favorite Lion King character!

Image Source: Disney
Ok, maybe not Timon per se, but definitely a meerkat aka suricate (suricata suricatta). Ok, enough of the Biology lesson, lets get into the techy stuff.
Again, we will be using Linux here. We’ll get started by installing and enabling Suricata at startup:
sudo apt install suricata
sudo systemctl enable suricata
Once we have Suricata installed, we can take a look at the directory structure and familiarize ourselves with the layout:
cd /etc/suricata
ls -la
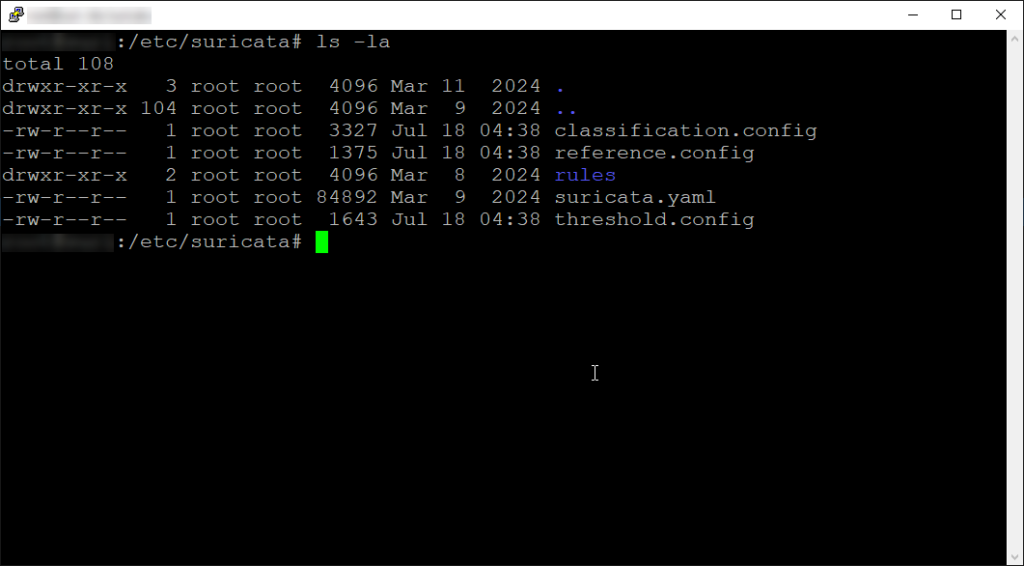
There not much to the directory structure here, but lets go over everything.
Main Directory (etc/suricata)
classification.config – used in prioritizing rules by defining classifications, each with a short name, description, and default priority. This prioritization enables effective alert classification and response. This file is commonly edited by administrators who want to customize the prioritization of rules based on their organization’s specific security needs and threat landscape
reference.config – serves as a reference guide for the rules used by Suricata. It contains information such as URLs, CVE identifiers, or other references to relevant documentation, advisories, or research articles associated with the rules. This file helps administrators understand the context and origin of the rules in Suricata’s rule set, aiding in incident response and mitigation efforts.
suricata.yaml – is the main configuration file for Suricata. This file contains various settings and parameters that control Suricata’s behavior, including network interface configuration, logging options, output formats, performance tuning parameters, etc. This file allows users to customize Suricata’s behavior according to their specific needs and environment.
threshold.config – is used to configure thresholding settings for Suricata’s alerts. Thresholding allows you to control the rate of alerts generated by Suricata based on certain conditions, such as the number of times a specific rule triggers within a specified time frame.
Sub Directories
/etc/suricata/rules – this directory contains configuration files and custom rule sets tailored to the specific needs of a deployment.
Logging
/var/log/suricata – directory is where Suricata typically stores its log files. Suricata generates various logs during its operation, including alerts, HTTP logs, flow logs, and other diagnostic information. These logs provide valuable insights into network activity, detected threats, and Suricata’s performance.
Other
/var/lib/suricata/rules – this directory contains the default rule sets provided by Suricata and any additional rule files downloaded or updated by Suricata’s rule management systems.
Now that we have an understanding of the purpose of each file, lets get started with configuration. We won’t be making any changes in any of the other files beyond the main configuration file, suricata.yaml.
sudo vim /etc/suricata/suricata.yaml
We’ll start with configuring our IP address range. This is located at the top and set under HOME_NET.
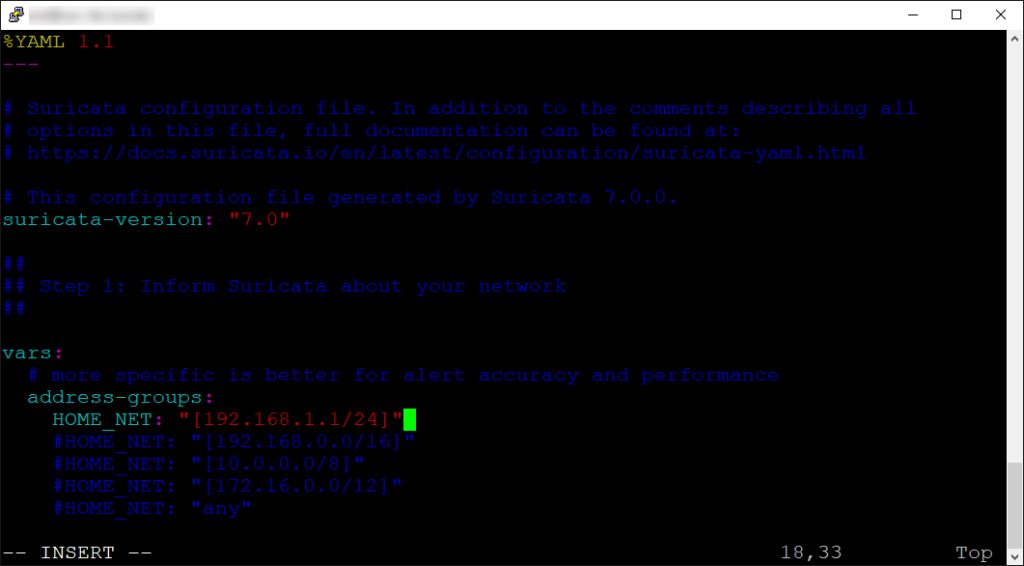
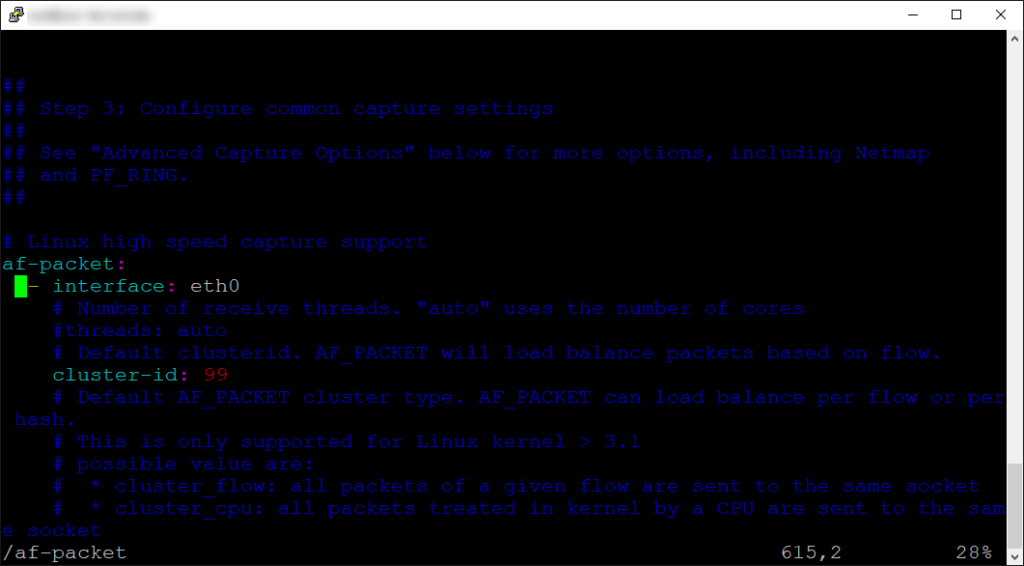
Once we have that set, we need to make sure the appropriate interface is set in place. Using your text editor of choice, find the “af-packet” section. Here you will see a field for interface, make sure that matches your network’s interface.
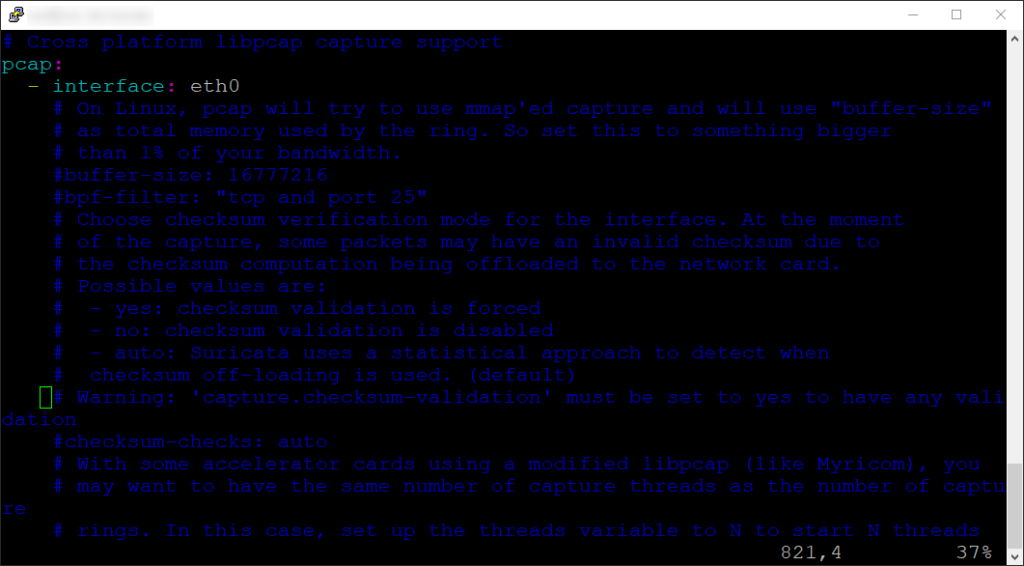
I also like to set the interface on the lippcap capture support for pcap files. You can find this under the pcap section under the interface option.
Lastly, we will enable the “community-id” option. This is used to enable or disable the generation of the Community ID hash for network traffic. Community ID is a unique identifier for network flows defined by the Zeek network security monitoring platform.
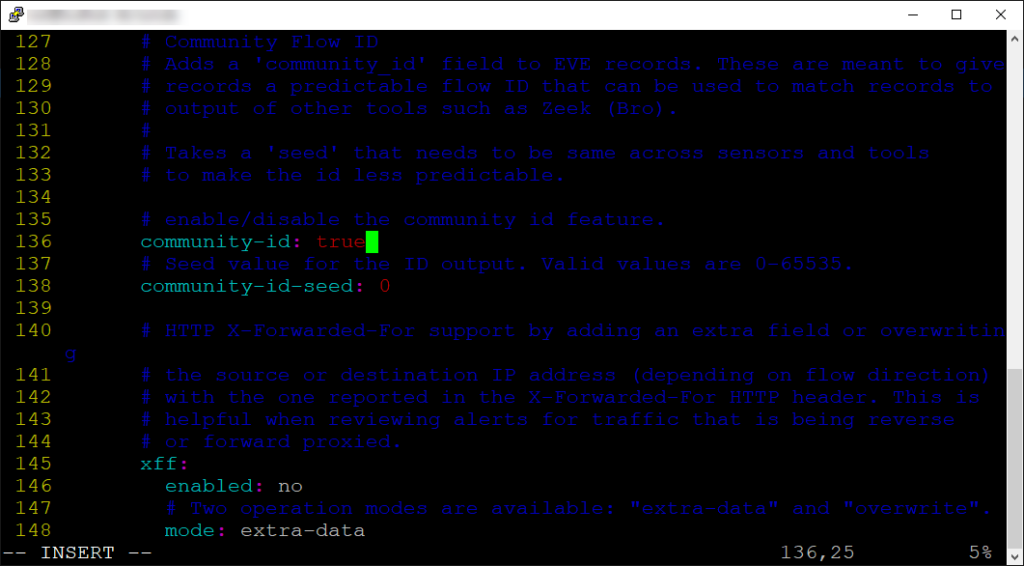
Zeek is a open-source network analysis framework. It provides a platform for network traffic analysis, protocol parsing, and security monitoring in real-time. It’s widely used in various environments, including enterprise networks, academic institutions, and research organizations, to gain insights into network activity and detect security threats.
We won’t be using Zeek here, but I wanted to cover this setting as I want to do another post on the use of Zeek alongside Suricata in the future.
Once you make the final changes to the suricata.yaml file, save your changes.
Next we will run the following command:
sudo suricata-update
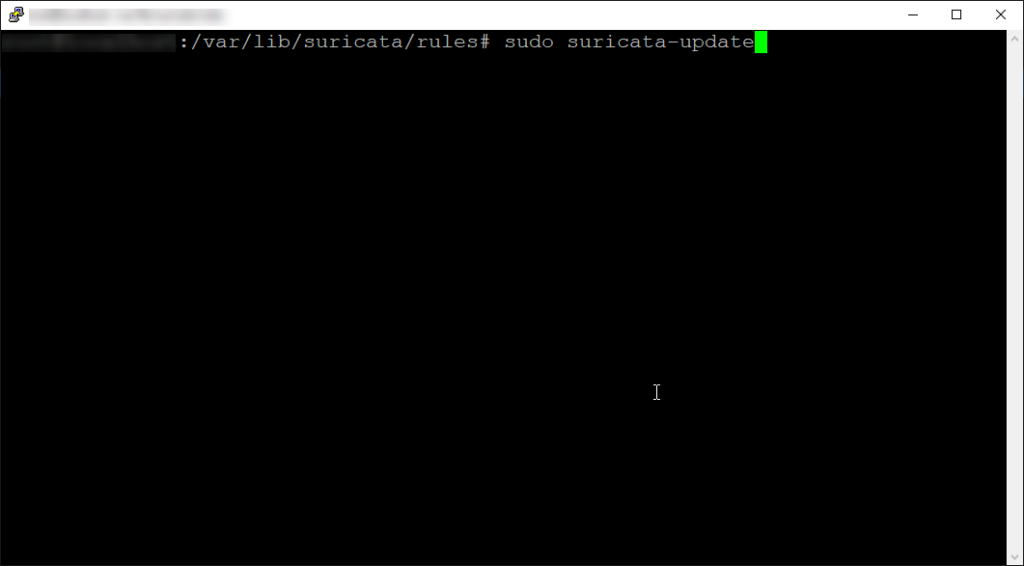
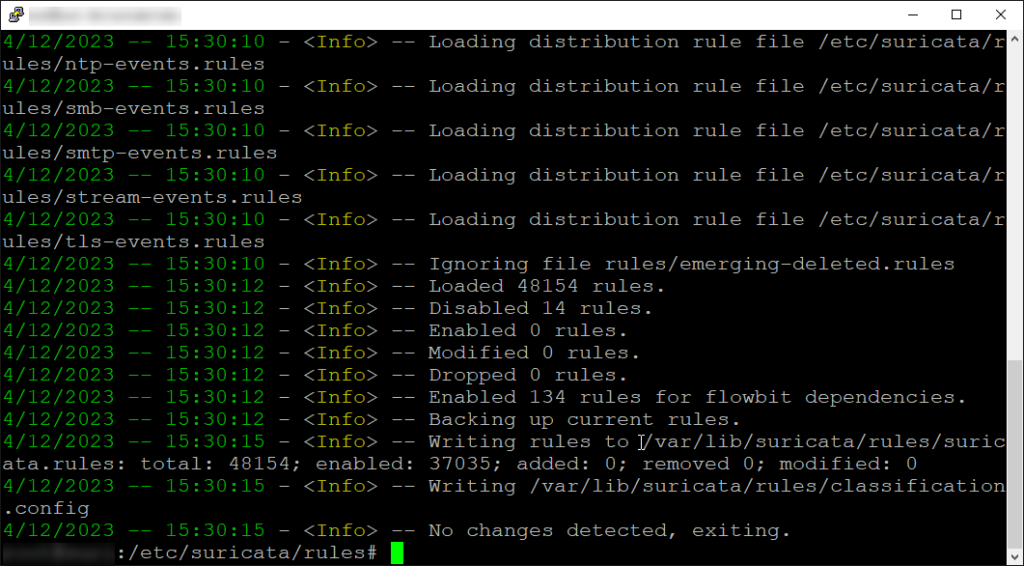
This command is used to update Suricata’s rule sets and related files. Suricata relies on rule sets to detect potential security threats and attacks in network traffic. These rule sets contain signatures or patterns that match known malicious behavior, allowing Suricata to identify and alert on suspicious activity.
This command connects to designated rule repositories (such as Emerging Threats Open or OISF) to download the latest rule updates. It then updates existing rule sets, adds new ones if available, and performs integrity checks to ensure file authenticity. Finally, it reloads Suricata’s configuration to apply the changes, ensuring it uses updated rules for network traffic analysis.
Before we get started on creating a custom rule, let’s cover one last area of Suricata. Run the following command:
sudo suricata-update list-sources
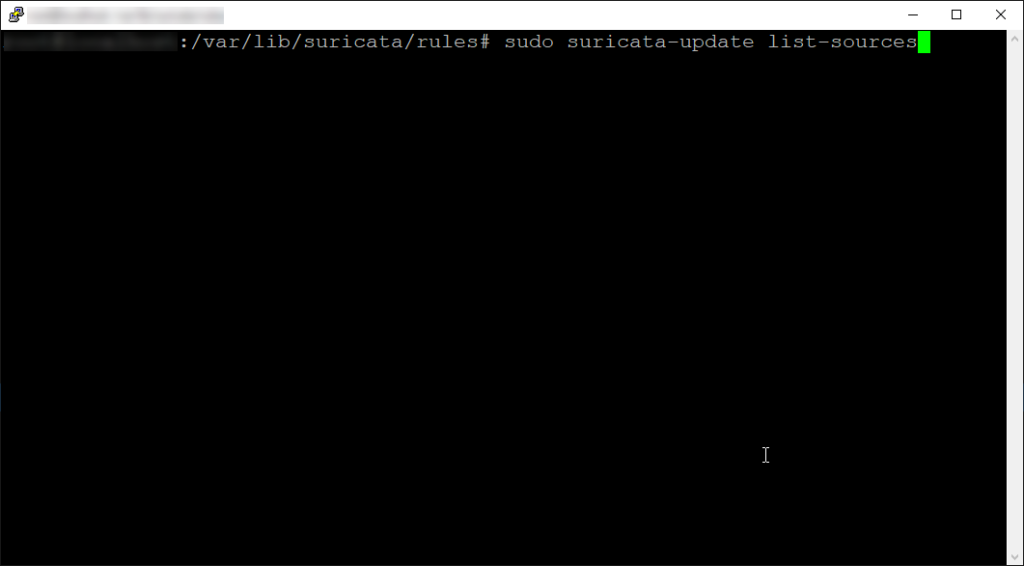
This command will list out available rule sources (sets) or repositories from which Suricata can download rule sets and related files. These rule sources typically include organizations or projects that maintain and distribute rule sets for network security monitoring tools like Suricata. Here is what the output might look like:
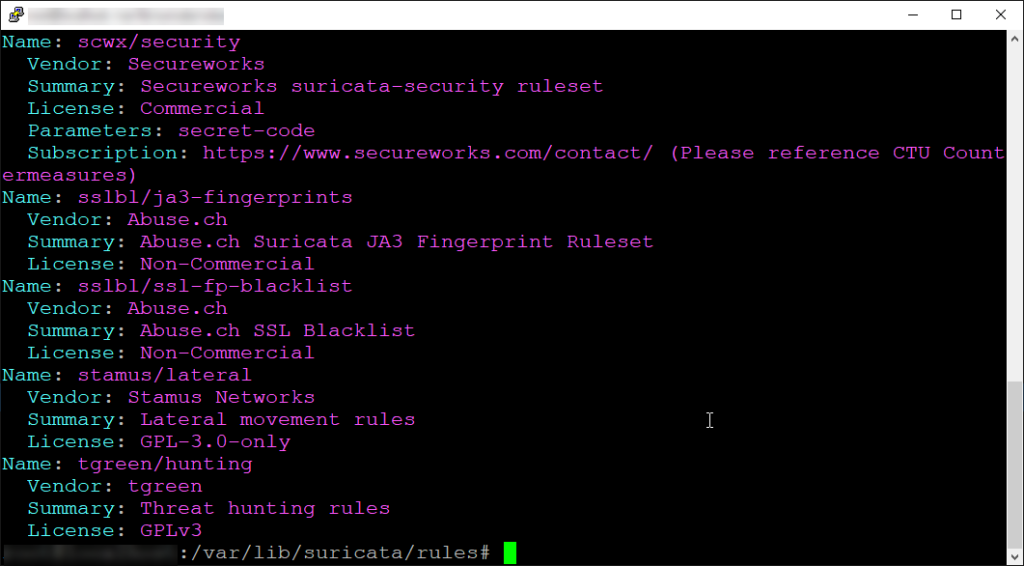
From here you can select a rule source that you would like to add, by typing the following command:
sudo suricata-update enable-source
This will add the source from the corresponding repository in the /var/lib/suricata directory. We won’t be covering the details of adding sources in this post, but I might cover this in more depth in the future.
Now lets get going on that custom rule shall we?
I’m going to make this simple as I want to cover Suricata in greater depth in the future as I mentioned earlier. The rule we be making will be detecting a ping flood (or excessive ICMP echo request messages).
First we need to create the rule file in the corresponding directory (/etc/suricata/rules):
sudo vim /etc/suricata/rules/ping_flood.rules
The syntax here will be identical to what we’ve seen in Snort:
alert icmp any any -> $HOME_NET any (msg:"Ping Flood Detected"; sid:101; rev:1; threshold: type limit, track by_src, seconds 60, count 5;)
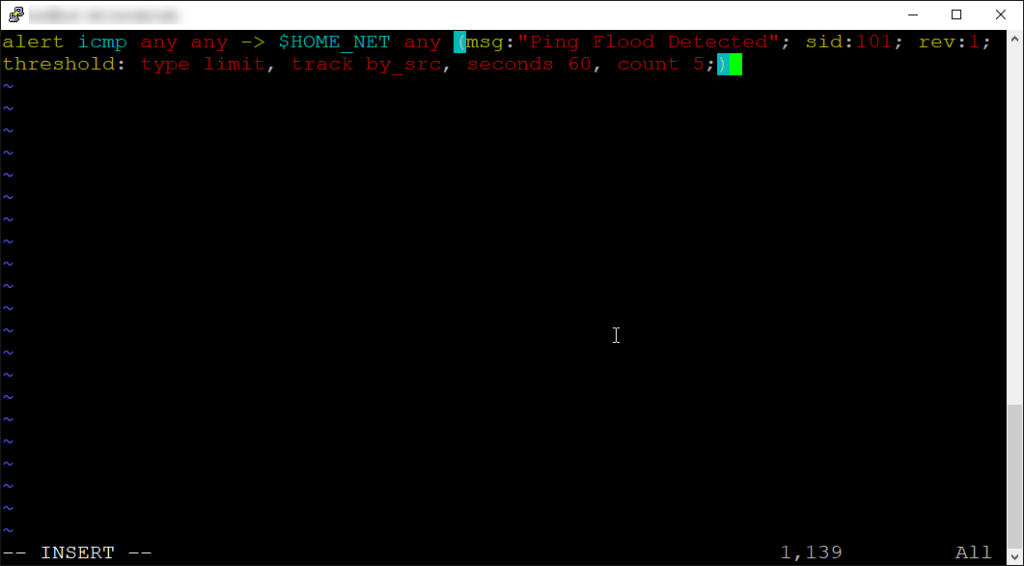
Here’s the breakdown again:
alert – This keyword specifies the action to be taken when the rule’s conditions are met. In this case, it means that if the conditions specified in the rule are matched, an alert will be generated.
icmp – This specifies the protocol to which the rule applies, in this case, ICMP
any any – The rule applies to any source IP address and any source port.
-> – Indicates the direction of the traffic flow.
$HOME_NET – This is a variable typically defined in the Suricata configuration file. It represents the local network or networks being protected by the intrusion detection system (IDS). It could be something like 192.168.1.0/24 to represent a range of IP addresses.
any – The destination port is not specified, meaning the rule applies to any destination port.
msg:”Ping Flood Detected” – This is the message associated with the alert. If the condition specified above is met (i.e., an ICMP packet is detected), Suricata will generate an alert with the message “Ping Flood Detected”.
sid:101 – This is the unique identifier (SID) for the rule. Each Suricata rule has a unique SID to differentiate it from others.
rev:1 – This specifies the revision number of the rule. It is typically incremented when the rule is modified or updated.
threshold – type limit, track by_src, seconds 60, count 100: This setting imposes a limit-type threshold, tracking events on a per-source IP basis within a 60-second sliding window. It triggers an alert if the count of events from any single source IP surpasses 5 within this timeframe.
Make sure to save the rule and exit the editor. This rule should trigger an alert if anyone pings our network beyond 5 ICMP messages (indicating a potential ping flood). 5 may be a little on the low side, but this is just for testing purposes.
Before we go and try to test this alert, lets make sure we add the rule to the suricata.yaml configuration file:
sudo vim /etc/suricata/suricata.yaml
Simply search for the rule-path section and follow the format as such:
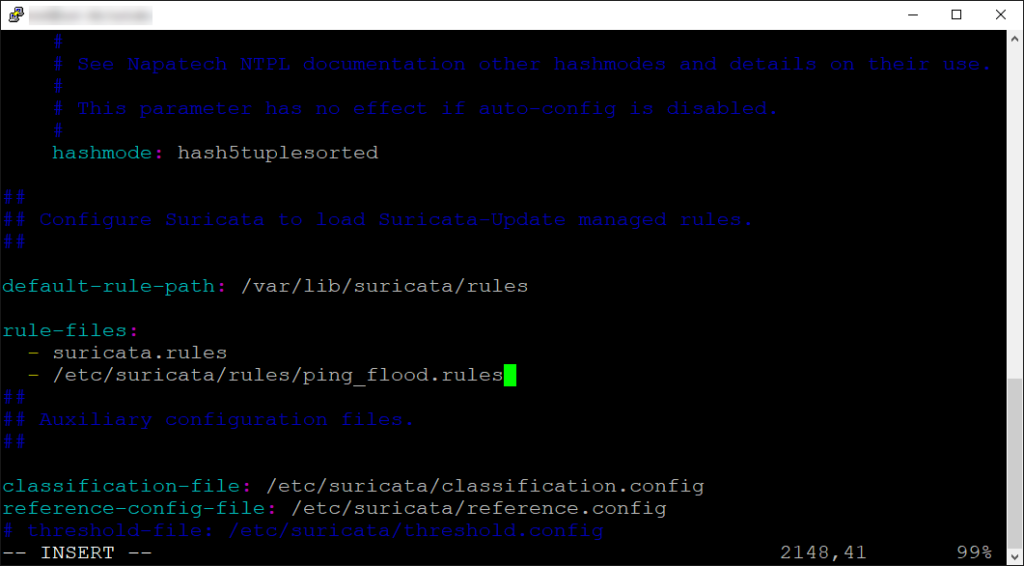
If you placed the rule in the default /var/lib/suricata/rules, you don’t have to specify the absolute path. In my case I used the directory that is recommended for custom rules, so I provided the absolute path since I did not change the default-rule-path.
Now let’s save our changes and get to testing!
Before we jump on our attacker machine and begin our test, lets make sure everything is configured correctly:
sudo suricata -T -c /etc/suricata/suricata.yaml -v
A quick breakdown on this command:
-T performs a configuration test. Instead of starting Suricata in monitoring mode, it checks the Suricata configuration file (/etc/suricata/suricata.yaml) for any syntax errors, misconfigurations, or other issues.
-c /etc/suricata/suricata.yaml specifies the path to the Suricata configuration file. Suricata will use this configuration file to determine its behavior, including which rules to apply, logging settings, and more.
-v this option increases verbosity. When testing the configuration (-T), Suricata will provide more detailed output, including information about the configuration test process and any issues encountered.
Our output should look similar to this:
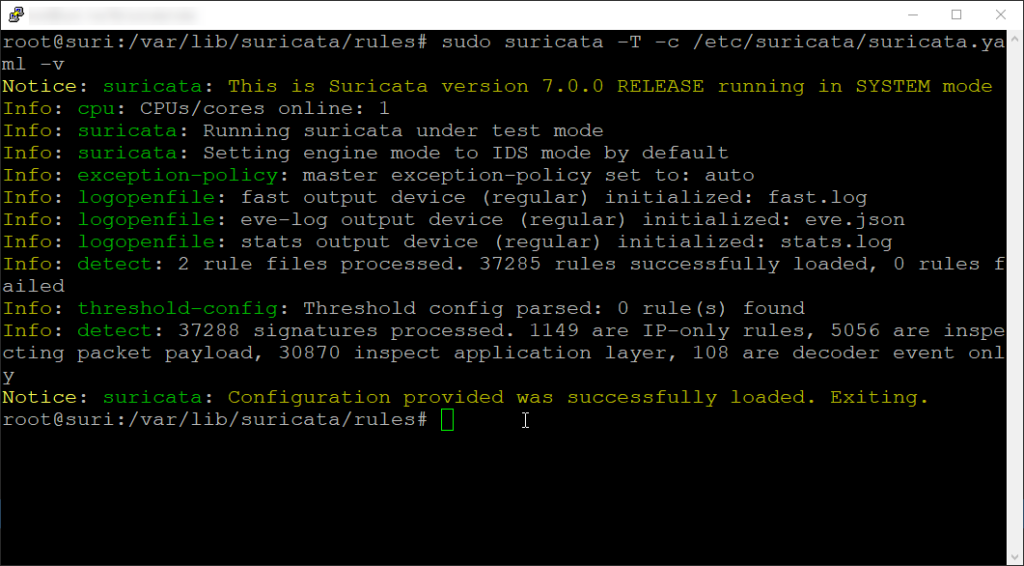
Ok, everything looks good here. Now we just need to restart the service and we are good to get started with testing.
sudo systemctl restart suricata
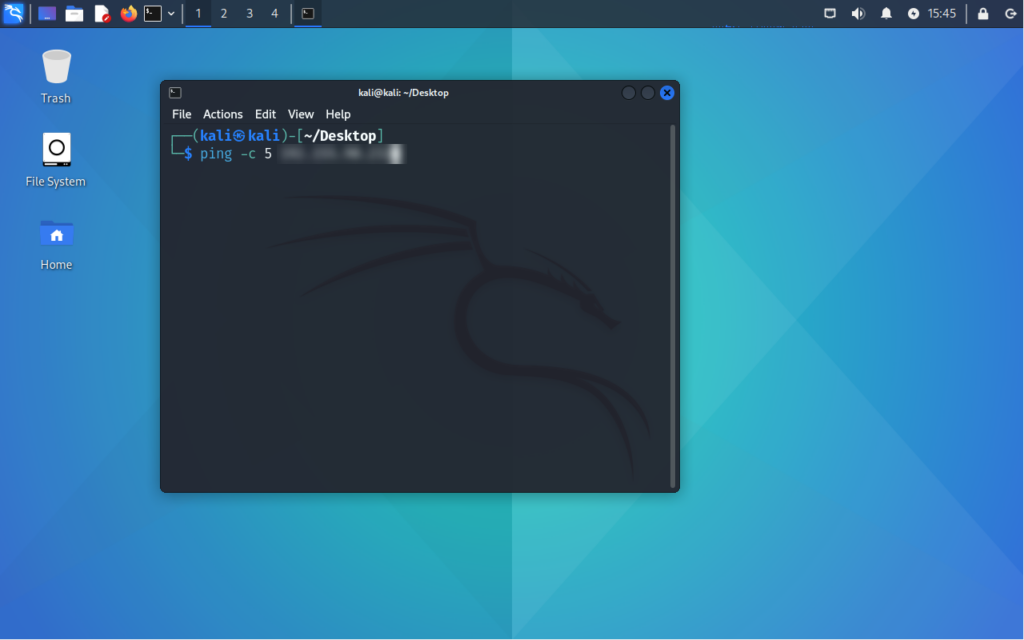
Now onto our attacker machine, lets run a quick ping with 5 counts:
Now we can tail the fast.log file and watch our alert come in:
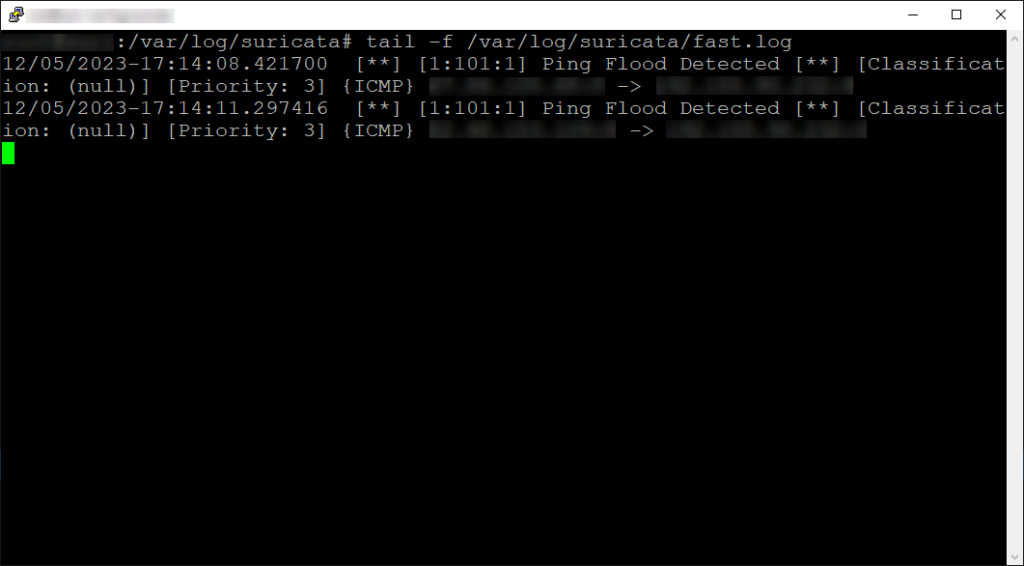
And there go! The rule works, now to wrap things up lets have it actively respond to this threat and block the traffic.
In order to configure Suricata to function as an IPS, you can refer to Setting up IPS/inline for Linux. I won’t go into specific detail here as that guide will cover it better than I would. What’s important here is to make sure IPS mode is enabled and the rule is set to drop not alert, like so:
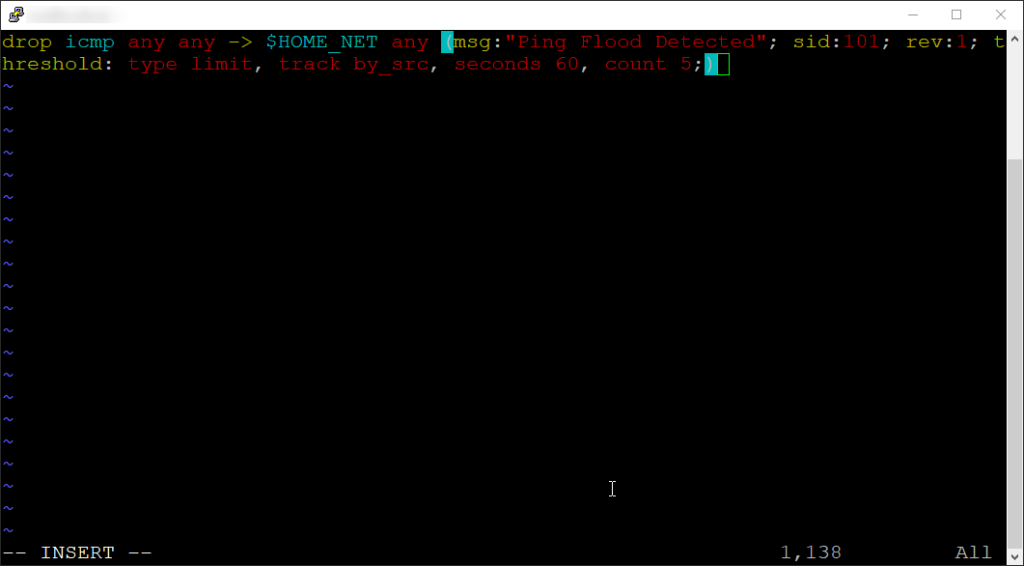
Once you have the rule set to drop, follow the Suricata documentation to configure Suricata to run in IPS mode. I followed the AF_PACKET IPS mode section as it was the most straightforward for this purpose.
Once you have Suricata configured in IPS mode and you run your test, you will see fast.log output a “Drop”, unlike what was seen previously when the rule was configured as an alert. This would look like so:
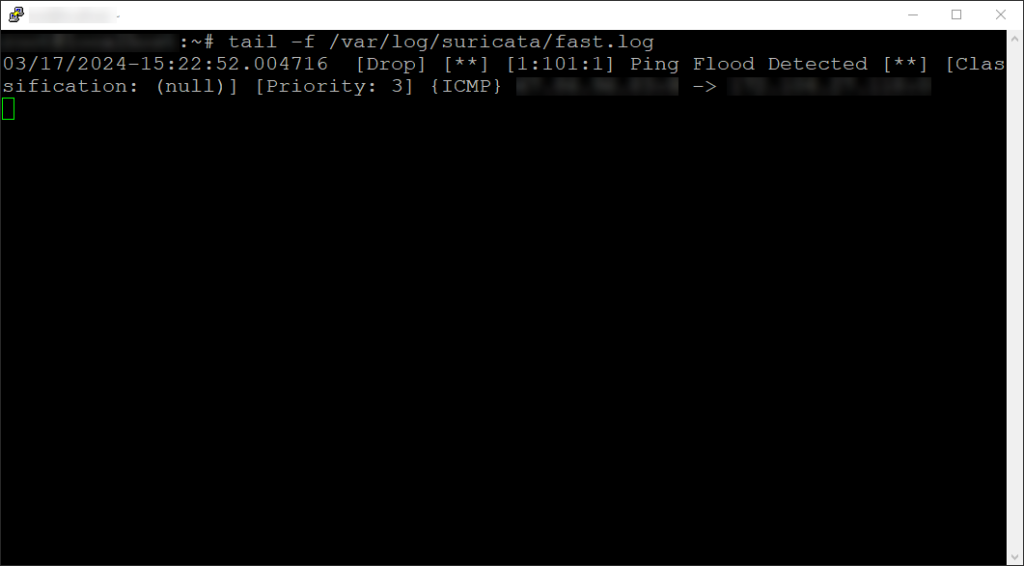
Be mindful, if you see a “wDrop” or “would Drop” appear instead of “Drop”, this means that the rule is set to drop the packet, but is not since Suricata is not set in IPS mode.
Thanks for sticking around this far! I hope you learned a thing or two and gained some understanding of the value and importance of such a n effective security tool. Suricata is a versatile IDS/IPS that offers real-time traffic analysis, threat detection, and response capabilities. With its advanced signature-based detection, protocol analysis, and support for custom rulesets, Suricata empowers network administrators to proactively safeguard their systems against a wide range of security threats. I hope you enjoyed the read, until next time!

