ProxyChains is a tool used for routing connections through proxy servers. It allows users to send network requests through one or more proxy servers, which can help in hiding their IP address and bypassing network restrictions or firewalls.
It’s commonly used for anonymizing network traffic, enhancing privacy and security, accessing geo-restricted content in addition to conducting penetration testing. By chaining multiple proxies together, users can obscure their original IP address and make it more difficult for third parties to trace their online activities.
ProxyChains comes pre-installed with Kali Linux where we will be conducting our testing, but you can install it manually using the following command (depending on your package manager):
sudo apt install proxychains
sudo dnf install proxychains-ng
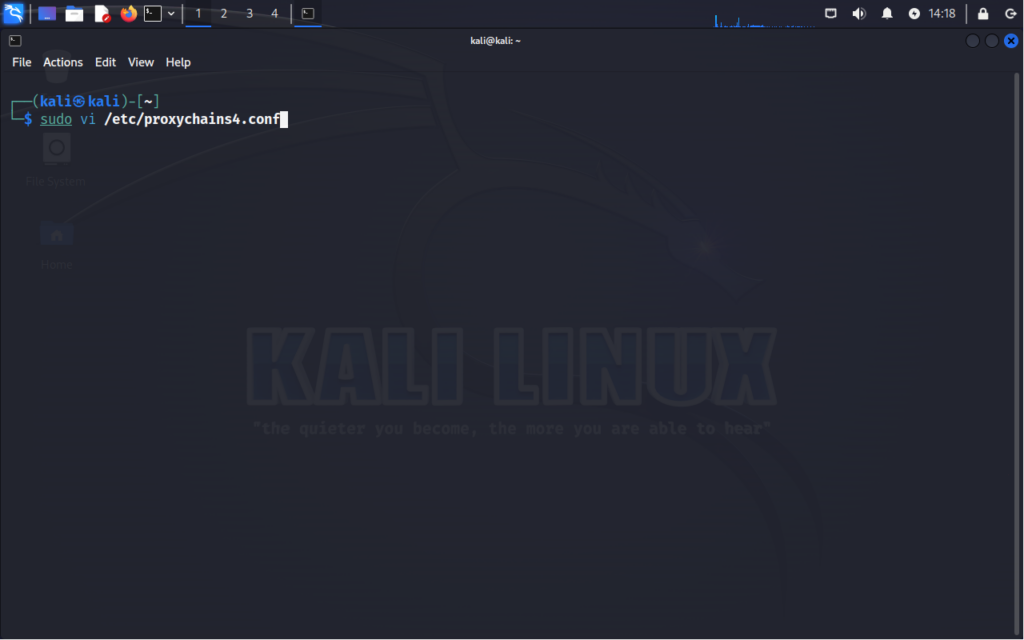
Now that we have ProxyChains installed, lets start off by taking a look at the main configuration file /etc/proxychains4.conf:
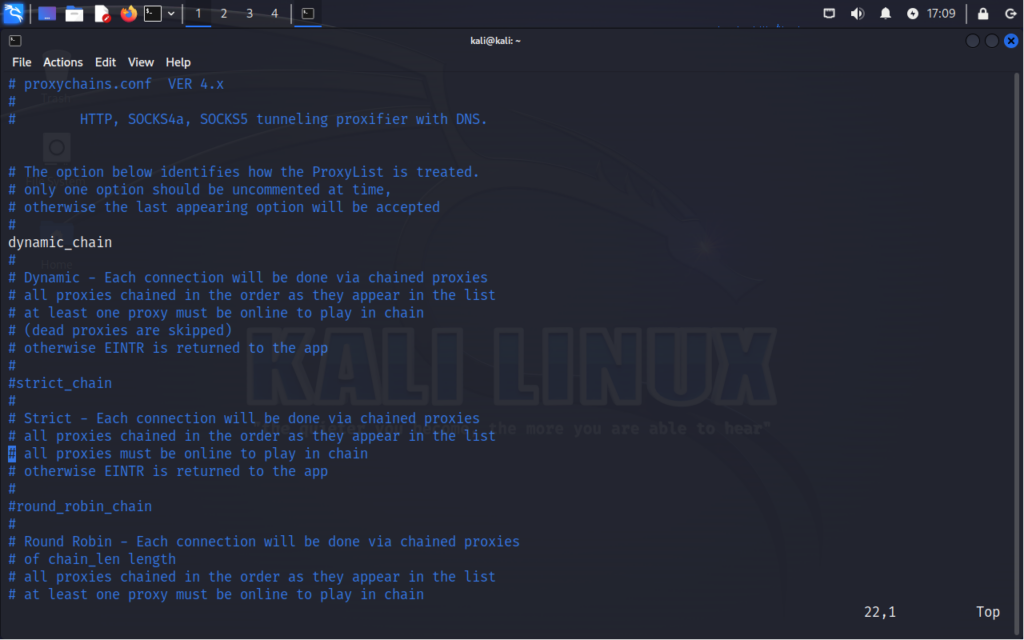
Starting off you will need to select a main option, only one can be selected at a time. If there is more than one uncommented, then the last appearing option with be selected.
Here’s a quick breakdown of each chain option:
dynamic_chain – This option allows ProxyChains to select proxy servers dynamically from the list provided in the configuration file. It’s useful when you want ProxyChains to choose proxies automatically based on availability and performance.
strict_chain – In this mode, ProxyChains adheres strictly to the order of proxy servers specified in the configuration file. Each connection attempts to pass through the proxies sequentially, starting from the first proxy in the list. The connection will proceed to the next proxy server only if the previous one successfully handles the traffic. If any proxy server fails to respond or becomes unavailable, ProxyChains will halt further routing attempts, ensuring that traffic flows through the specified proxies in a controlled manner.
random_chain – This option randomly selects proxy servers from the list provided in the configuration file for each connection. It offers a higher level of anonymity by changing the proxy server used for each connection, making it harder to trace.
round_robin_chain – Similar to random_chain, this option rotates through the list of proxy servers for each new connection. However, it does so in a sequential manner, ensuring that each proxy server is used in turn before starting again from the beginning of the list.
For our testing purposes, we will be using dynamic_chain as it will simply go down our list and skip any proxies that may be down.
Quiet mode in ProxyChains suppresses most output messages, making the program operate silently unless an error occurs. When ProxyChains runs in quiet mode, it minimizes the amount of information displayed on the console or terminal, providing a more streamlined and unobtrusive experience. It is important to note that quiet mode in ProxyChains suppresses most informational output, but it doesn’t suppress error messages or critical warnings.
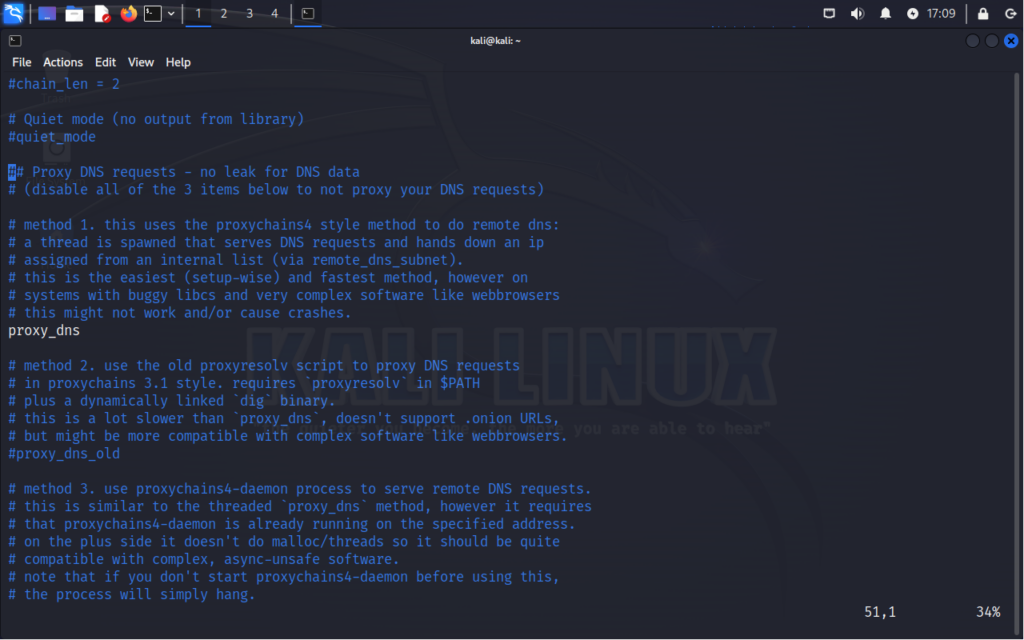
Now, Proxy DNS requests section allows you to specify how DNS resolution should be handled when ProxyChains is routing traffic through proxy servers. This section provides options for configuring DNS resolution behavior to ensure that DNS queries are handled securely and efficiently. Here’s a breakdown of the options typically found in this section:
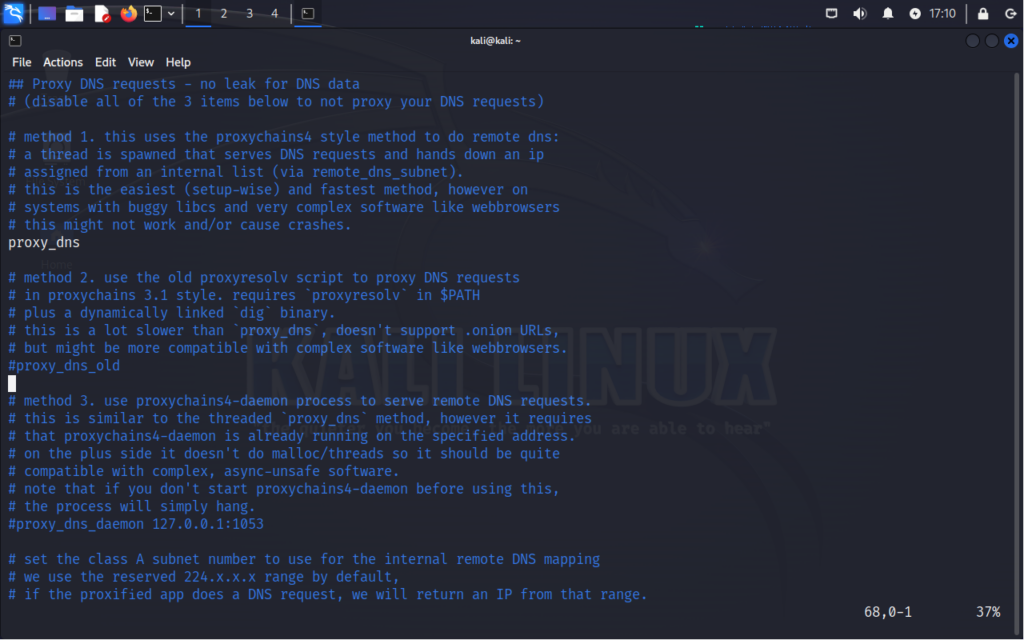
proxy_dns – This option specifies whether DNS requests should be routed through the proxy servers defined in the configuration file. When enabled, ProxyChains sends DNS queries through the proxy chain, helping to anonymize DNS traffic and prevent DNS leaks.
proxy_dns_old – This option is an older method for handling DNS requests. When enabled, ProxyChains uses the older implementation for routing DNS queries through the proxy servers defined in the configuration file. It functions similarly to the proxy_dns option but may have different behavior or performance characteristics due to its older implementation. It requires “proxy resolv” in the $PATH variable and a dynamically linked dig binary. It also does not support .onion URLs. This may have specific-use scenarios.
proxy_dns_daemon – This option involves running a local DNS resolver daemon alongside ProxyChains. When enabled, ProxyChains forwards DNS queries to the local daemon instead of directly resolving them. The local daemon then handles DNS resolution, potentially caching results for improved performance and allowing for more granular control over DNS requests. This method can be particularly useful in situations where you want to customize DNS resolution behavior or enhance performance through caching.
Moving on, we will find some subnet, timeout and exclusion sections:
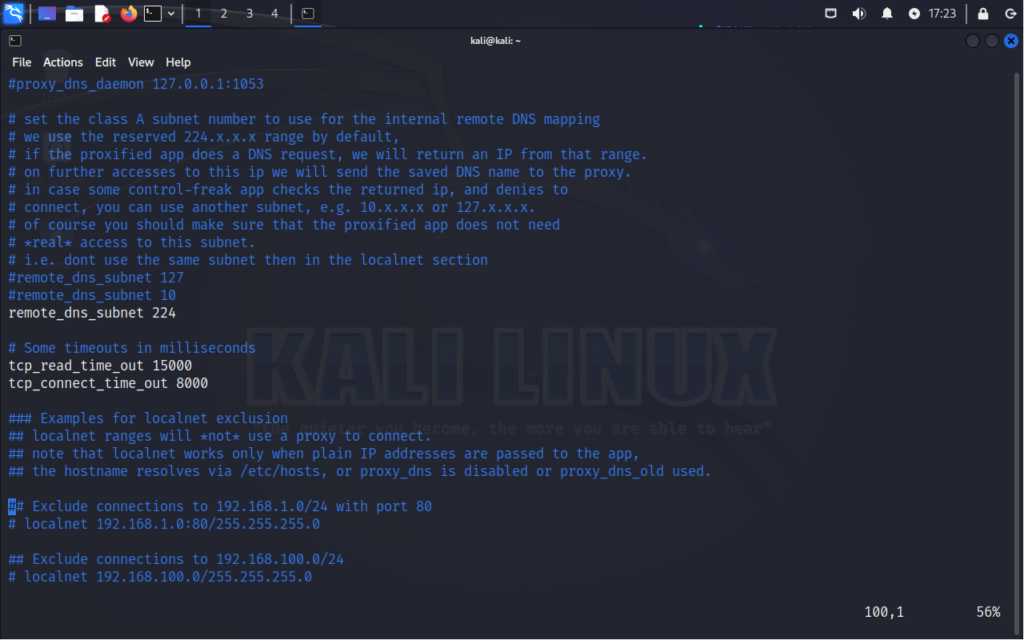
The remote_dns_subnet setting in ProxyChains defines the Class A subnet number used for internal remote DNS mapping, with the default range being 224.x.x.x.
The following three sections can be configured as needed. Here’s the general summary of each:
The timeouts configuration sets the TCP read timeout to 15,000 milliseconds (by default) and the TCP connect timeout to 8,000 milliseconds.
The localnet exclusion section demonstrates how to exclude connections to the IP range 192.168.1.0/24 on port 80 from being proxied.
The exclude connections sections shows how to exclude connections to the IP range 192.168.100.0/24 (by default) entirely from being routed through ProxyChains.
Unless you need to modify these, I would leave them as the default configuration. The rest of the configuration settings I’ll skip over as you generally won’t be touching these unless you have a specific use-case scenario. Let’s get to testing ProxyChains out, shall we?
If you move down to the end of the configuration file, you will find the format for the list:
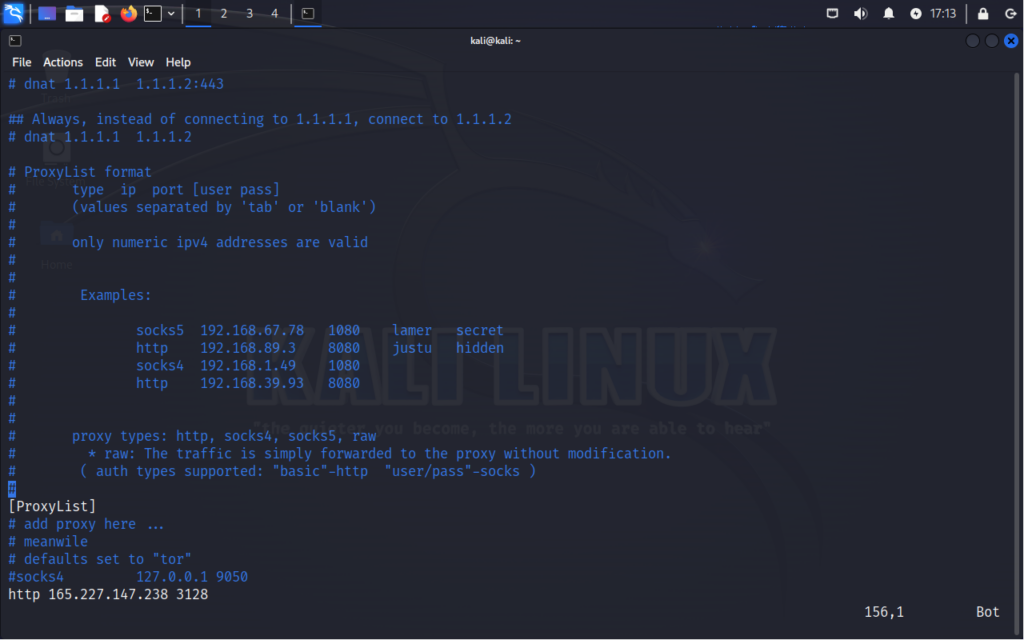
The format is <protocol> <ip> <port>. If you are using a proxy that requires a username/password then you will format is <protocol> <ip> <port> <username> <password>. This is pretty straightforward, you simply have to follow the format add a proxy and leave it uncommented if you would like it to be included in your chain.
Here I added a few proxies that I have tested. All we have to do is save the configuration file and we can begin our test.
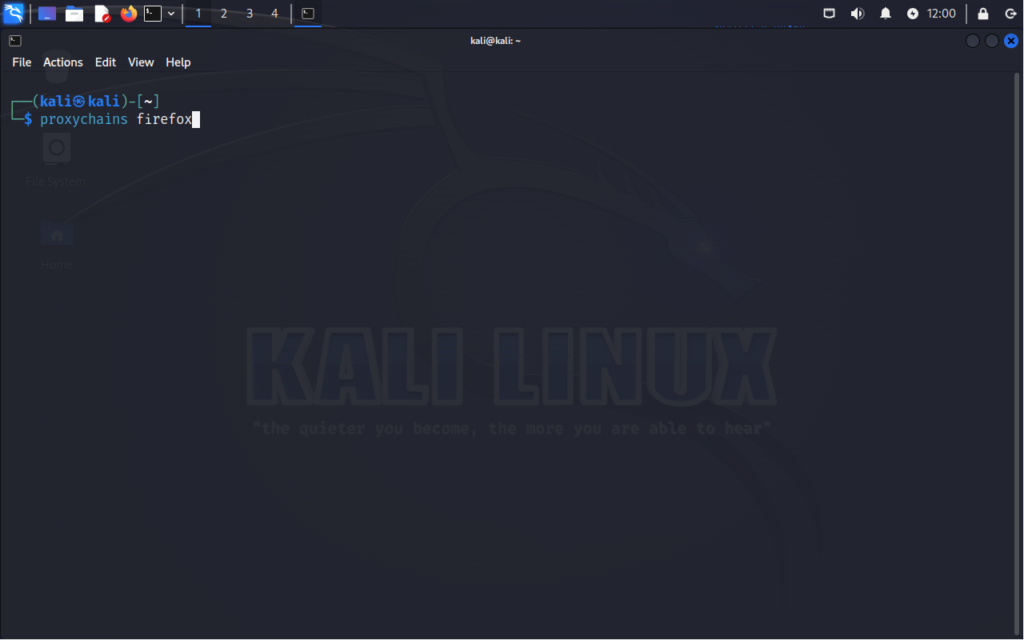
Simply to run the configuration the syntax is proxychains <application> <options>. Here we will be running Firefox using our proxy list.
Once we launch firefox via the proxychains command, we will see our output telling us how the traffic is being routed.
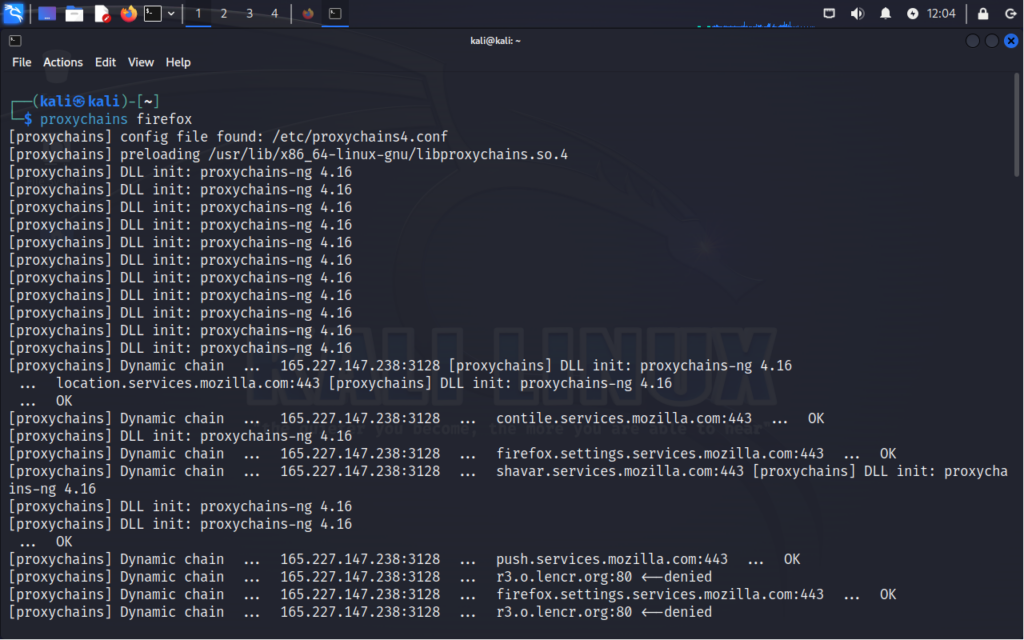
For testing purposes I used a free proxy based out of Germany. As you can see, the output tells us what type of chain we are using and the IP address/addresses that are being traversed. Here I simply navigated to Google and searched for “what is my ip”. I clicked on the first result http://whatismyipaddress.com and here is the result:
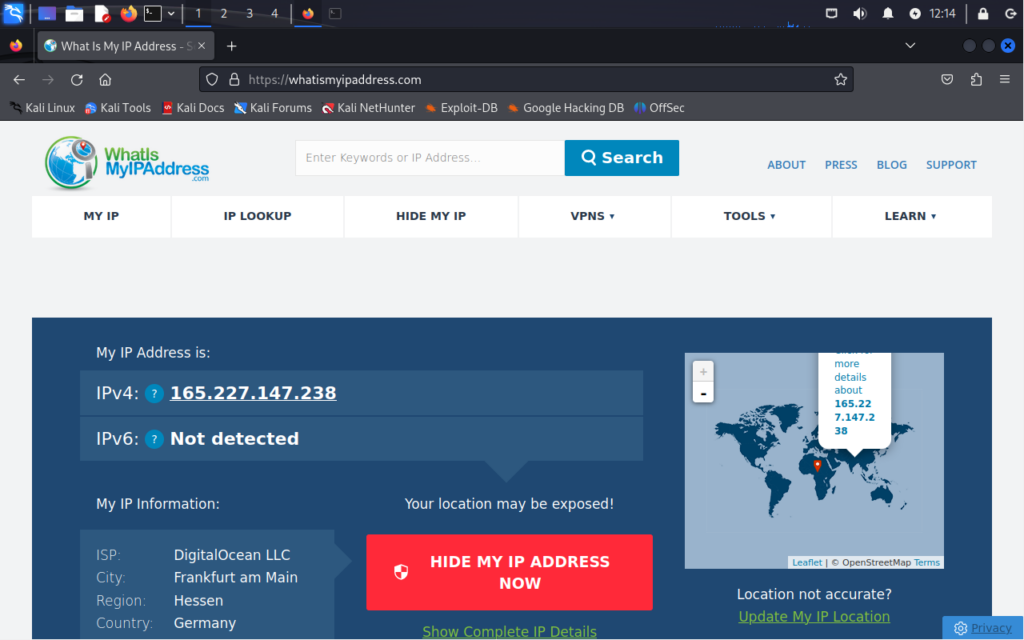
And our proxy is working! Not only does the output tell us so, but this page is telling us we are based out of Frankfurt, Germany (far from where we are).
In my example I only used one proxy, but once you chain multiple you will see the path via the terminal output.
In conclusion, ProxyChains empowers users with the ability to enhance privacy, security, and anonymity by seamlessly routing network traffic through a chain of proxy servers. Its intuitive configuration options and versatile compatibility make it a valuable tool for safeguarding online activities, circumventing geo-restrictions, and conducting penetration testing securely. Whether for everyday browsing, penetration testing, or circumventing censorship, ProxyChains remains a valuable asset for those seeking greater control and protection over their internet connections.

